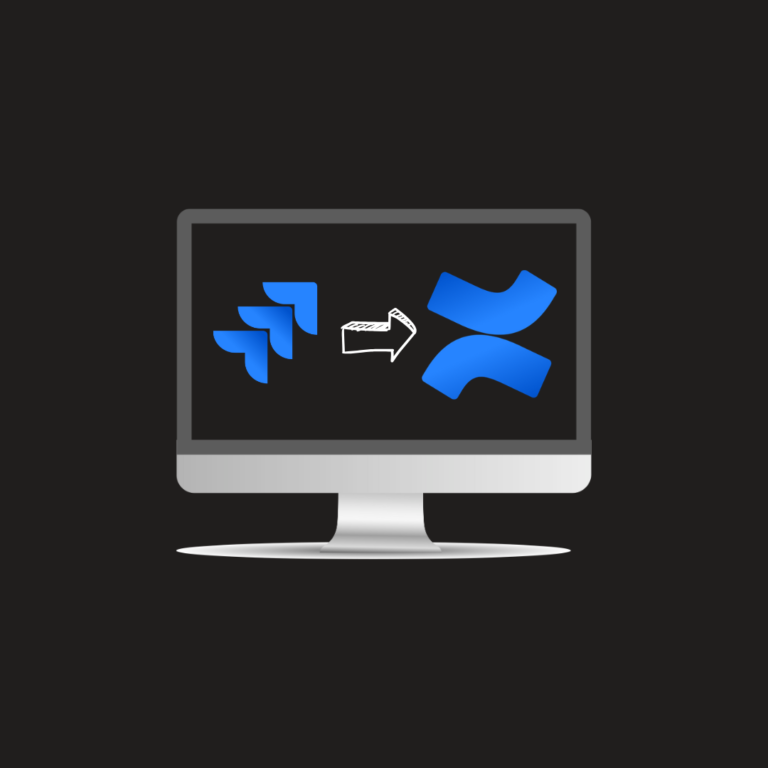
This guide explains how to integrate Jira Cloud with Bitbucket, providing a time-saving and efficient solution for organizations using both tools. While designed as a beginner’s guide to integration, some basic familiarity with Jira and Bitbucket is recommended.
Why integrate Jira with Bitbucket?
Integrating Jira with Bitbucket offers several advantages:
- Repository activity – By linking Jira issues to repositories or branches in Bitbucket, you can easily track activities performed on these linked repositories and branches.
- Jira automation – Repository actions, such as commits, pull requests, or branch creation, can trigger automation rules on linked Jira issues. This helps reduce manual effort and keeps projects organized.
- Time-Saving – The integration reduces time spent switching between tools by linking issues and repositories. It also facilitates automation, making navigation between Jira and Bitbucket smoother and more efficient.
How to quickly integrate Jira with Bitbucket
All these steps are also mentioned in official Atlassian’s documentation for integrating Jira with Bitbucket.
Follow these steps to quickly integrate Jira with Bitbucket:
- Enable Code Features
- Open your Jira project and navigate to Project settings.
- In the Features section, ensure the Code feature is enabled along with other development-related features.
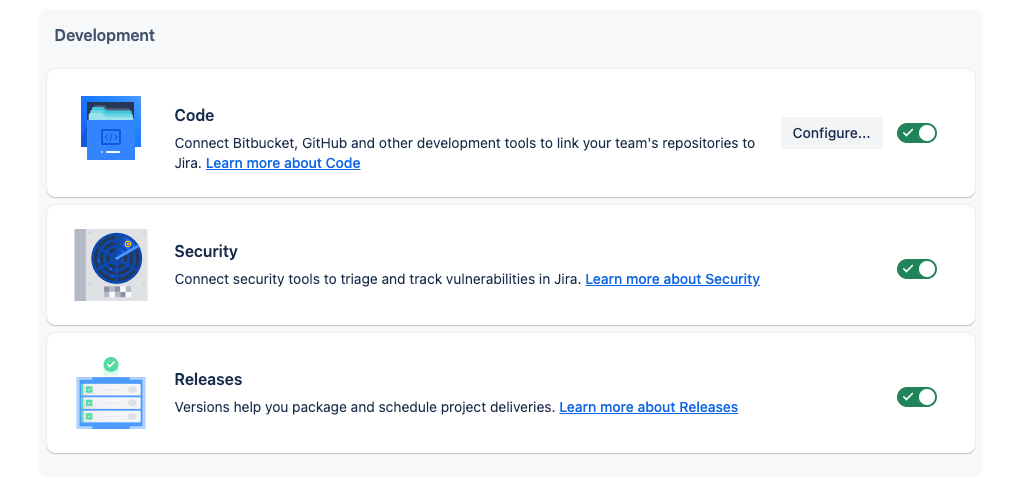
- Access the Code feature
- Exit the project settings and locate the Code option in the sidebar under Development.
- Connect to a Bitbucket Workspace
- Select the Bitbucket workspace you want to connect to your Jira project from the options provided.
Once connected, your Jira is linked to your Bitbucket workspace, and you’re ready to start leveraging the integration.
Link Jira issue to Bitbucket repository
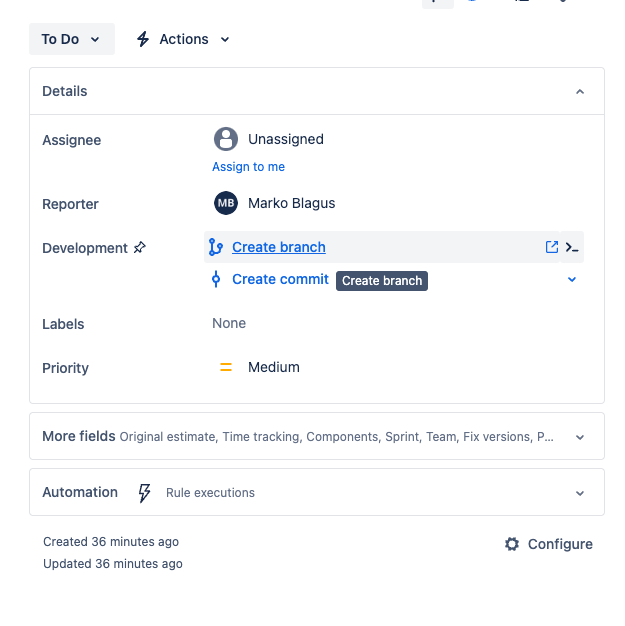
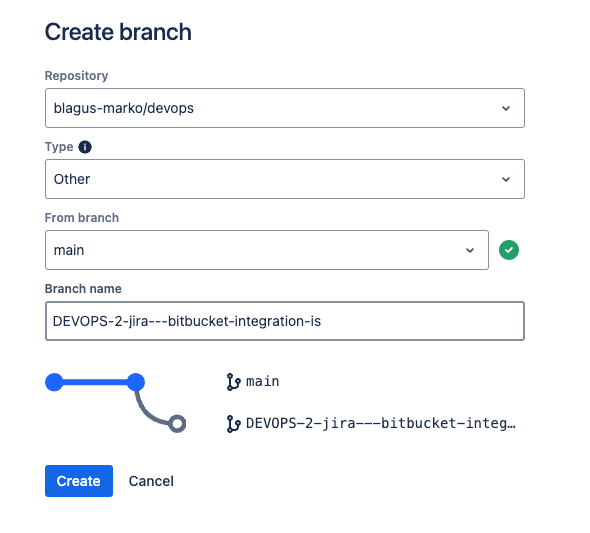
After integrating Jira with Bitbucket, you can link a Jira issue to a Bitbucket repository or branch. To do this, open the issue and click on the Create branch option in the Development section.
A new Bitbucket window will open, where you’ll need to configure the following details:
- Repository – Select the Bitbucket repository where the new branch will be created.
- Type – Choose the type of branch (e.g., feature, bugfix, release).
- From branch – Specify the branch you want to base the new branch on.
- Branch name – Provide a name for your branch, ensuring you include the issue key to link it to the Jira issue.
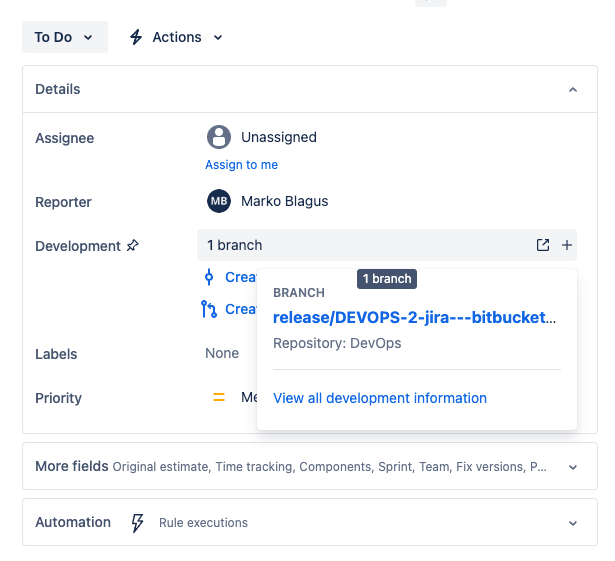
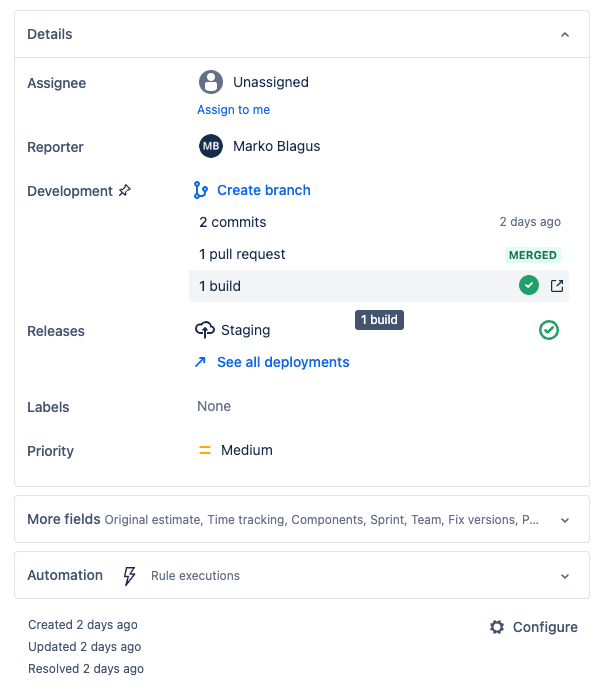
After you create it, and go back to your issue, you will now see that you have 1 branch linked to your issue.
Commits
Commits are automatically linked to your Jira issue, whether made locally in your IDE or directly in Bitbucket. It’s important to include Jira issue key in commit message. Here’s an example of what happens when you create a new commit online in Bitbucket:
- Navigate to Your Repository: Open your repository in Bitbucket and go to the Source tab.
- Add a File: Click on the three dots in the upper-right corner and select Add file.
- Select the Branch: Ensure you’re working on your new branch (not the main branch) and create a file of any type.
- Commit the File:
- Click on the Commit button.
- Before committing, include the Jira issue key in the commit message.
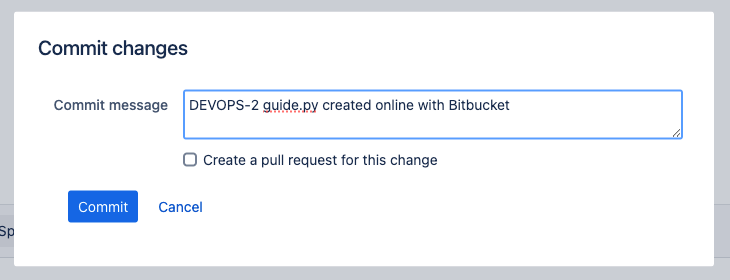
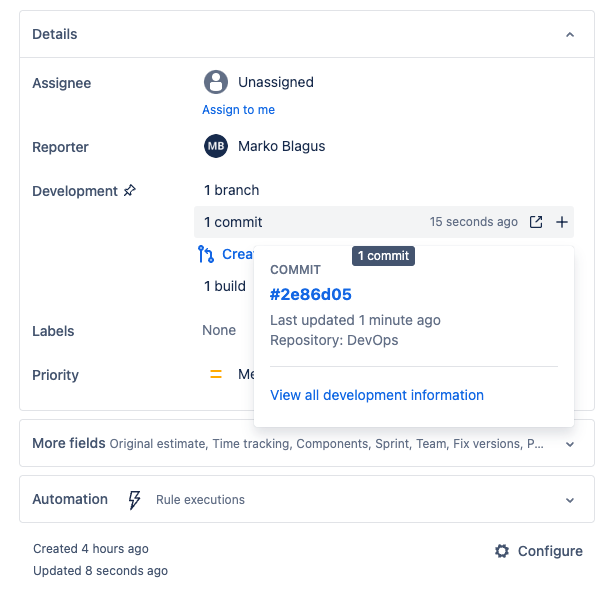
- Once you’ve committed the changes:
- Return to your Jira issue.
- You should see the new commit listed in the Development section, with details about the linked file.
Pull requests
Pull requests are also automatically linked to Jira issues. Here’s an example of what happens in Jira when you create pull request in Bitbucket:
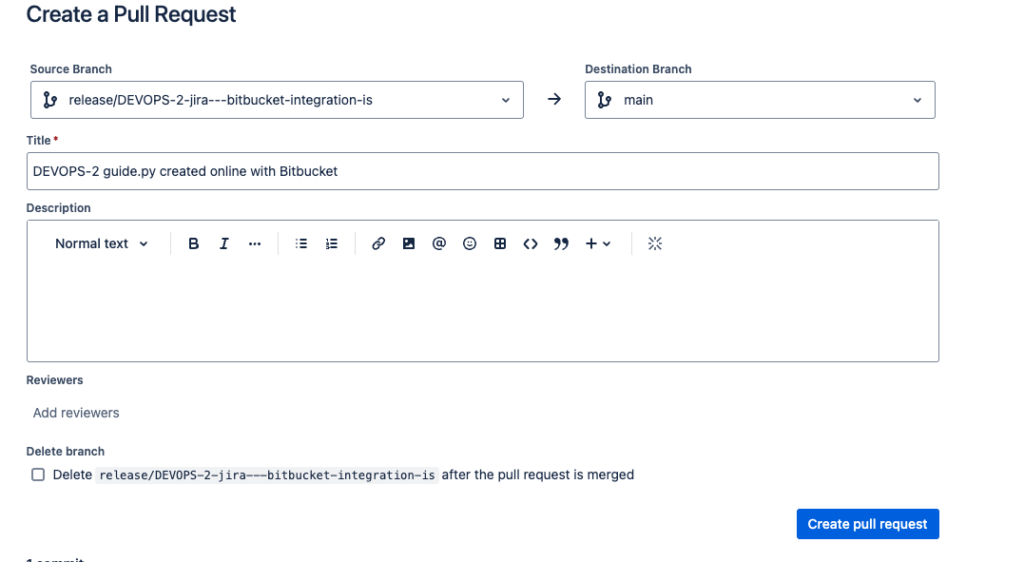
- Navigate to Your Repository: Open your repository in Bitbucket and go to the Pull requests tab.
- Create new pull request: Click on Create pull request button in upper right corner and pull request details will open (as shown on screenshot below). Make sure to include issue key in pull request title. Click Create pull request button.
- Once you created pull request:
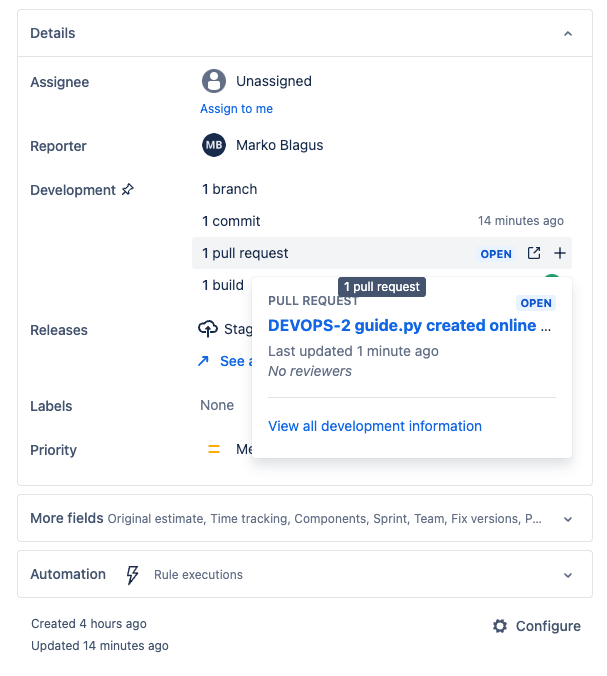
- Return to Jira issue.
- You should see the new pull request listed in the Development section.
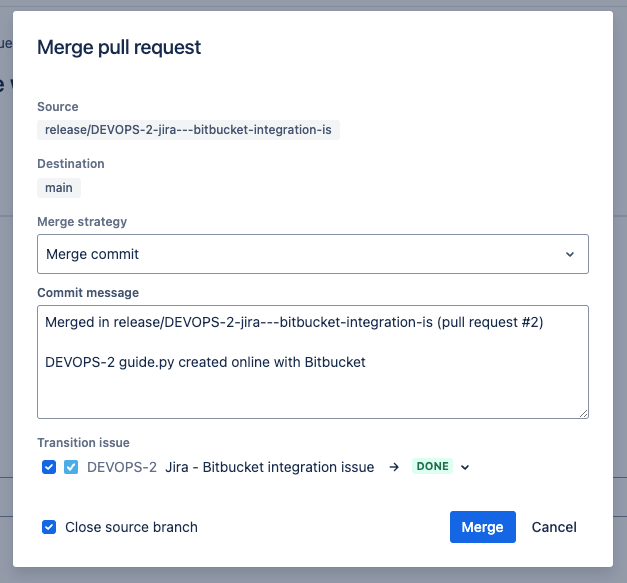
When a pull request is merged in Bitbucket, the update is automatically reflected in the linked Jira issue. Navigate to your existing pull request in Bitbucket and select the Merge button to proceed. A pop-up will appear with merge details (check screenshot below). Bitbucket offers the option to automatically transition the linked Jira issue to a status of your choice upon merging.
Once the pull request is merged, the Development section in your Jira issue will display the updated status of the issue, as well as the status of the pull request.

Pipelines
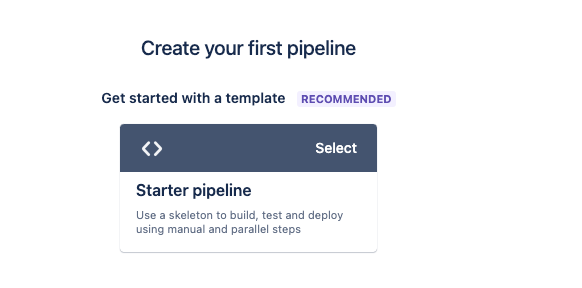
Bitbucket Cloud provides starter pipelines to help users implement CI/CD in their repositories. If you haven’t set up pipelines yet, you can do so by following these steps:
- Open your Bitbucket repository and select Pipelines from the left sidebar.

- Bitbucket will suggest a starter pipeline, which you can choose to begin.
- Upon selection, a
bitbucket-pipelines.ymlfile will open in edit mode. You can customize this file based on your requirements by selecting template you want.
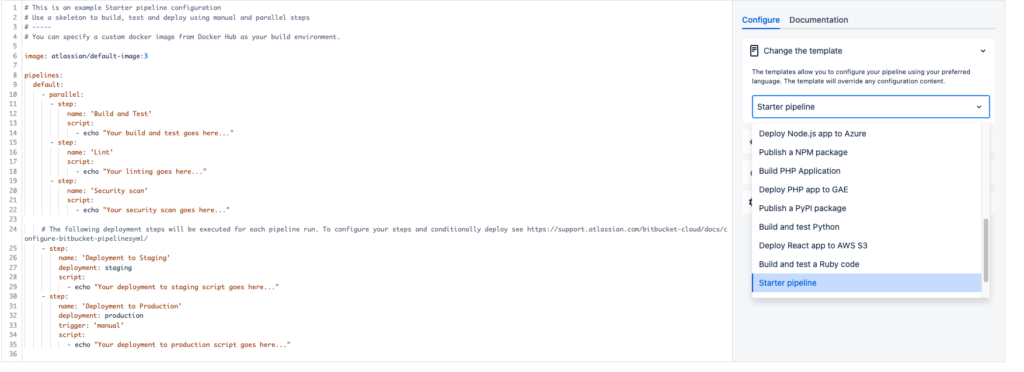
Some of the available templates include:
- Build PHP Application
- Build and test Python
- Build C++ Application
- Deploy Node.js app to Azure
After choosing a template, you can modify the bitbucket-pipelines.yml file to suit your needs. Once done, commit the changes to add it to your branch and repository.
Your automated builds are also displayed on the linked Jira issue, along with their status:
Jira issues
In Bitbucket, you can view all Jira issues associated with a specific repository. Simply open your repository and select Jira Issues from the left sidebar.
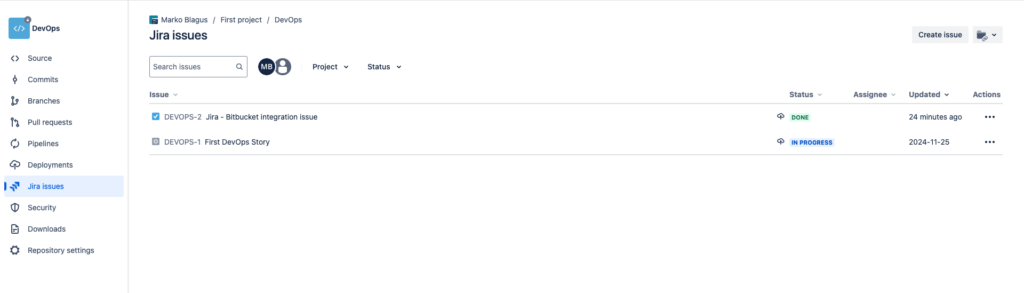
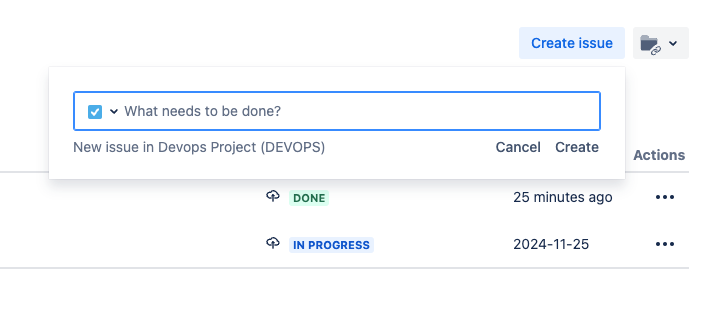
Additionally, you can create a new Jira issue directly from Bitbucket by clicking the Create issue button in the upper right corner.
Jira Automation rules
Jira Cloud automation rules make it easy to integrate with Bitbucket. When creating a new automation rule, you can choose triggers from the DevOps category. These triggers are specifically designed to respond to actions performed in Bitbucket.
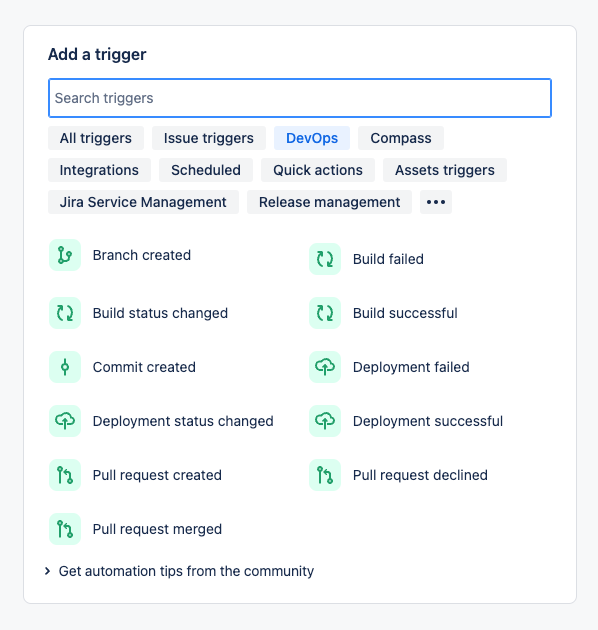
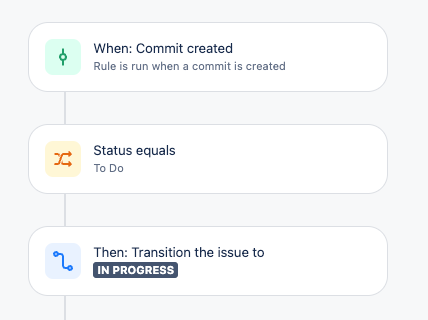
All the actions mentioned in this guide can also serve as triggers for Jira automation rules. For example, you can automate transitioning Jira issues from To Do to In Progress whenever a commit is created, as a commit typically indicates work has started. Here’s how you can set up a simple rule:
Reach out!
I hope this article was helpful to you! If you have any additional questions, want to dive deeper into the topic, I’d love to hear from you.
You can find links to my LinkedIn profile and email at the bottom of the page, or feel free to reach out via the Contact page.